 IRIS
IRIS
Intelligent Roadway Information System
WYSIWYG Message Editor
Prepared by SRF Consulting Group Inc.
Introduction
The WYSIWYG (What You See Is What You Get) message editor makes it easy to incorporate graphics, color elements and sophisticated text layouts, allowing DMS to be utilized to their full potential.
The user interface is designed to be intuitive and easy to use for both new users and sophisticated administrators. It enables users to:
- Enter and edit text
- Control font, color and justification of text
- Insert, resize or delete text and color rectangles
- Place images, with easy placement and editing of location
- Make action tags easy to insert and configure
Planning Your Message
Before creating or editing a message, it's advisable to verify several items to ensure that your message will display properly. Making a sketch of your message can help you identify sign resolution requirements, the availability of graphics and the space needed for action tags that have variable number of characters. Items to check include:
- Signs of different size and resolution can be included. Does the content of message fit on the sigs where you want to use it?
- Only graphic images in the library can be used in messages. Are all images you want to use loaded in the IRIS image library?
- If you want to use color (fonts, rectangles, or images) does the sign where you'll use the messages support color?
- There are recommended physical sizes for the letters in message on a sign, for example approximately 14 inches tall for messages on signs located on an interstate. Does your choice of font meet these requirements?
By planning your message, you can use the editor to quickly create communicative, attractive messages for roadside DMS.
Launching the Editor
The editor can be accessed in one of two ways:
- Select
View ➔ Message Signs ➔ Message Editormenu item.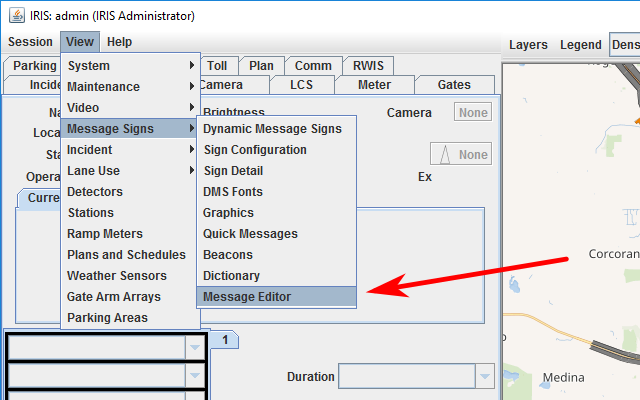
- Or, right click on any sign and select
Message Editorin the context menu
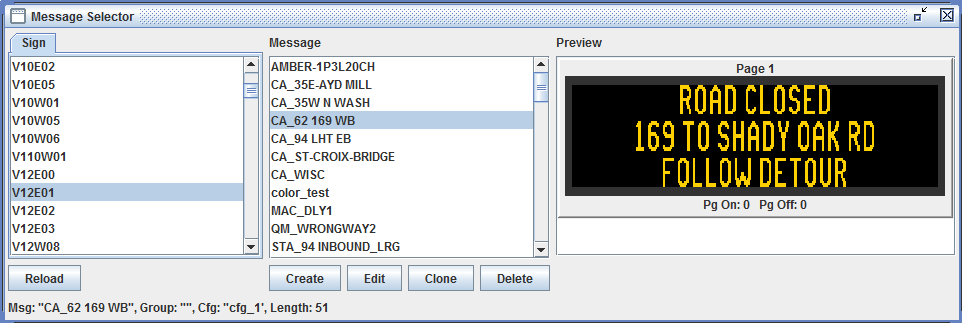
Once the editor is launched, the Message Selector window will appear.
You can now select a sign to get a list of existing messages. If you want to edit a message, select it from the list and a preview will appear.
Creating or Editing a Message
Only users with the dms_admin role have the necessary permissions to create
or edit messages. Editing will only be enabled if edit mode is turned on.
- To edit an existing message, select it in the
Messagelist and clickEdit. - To create a new message, click
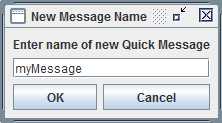
Create.- A window will appear asking you to give your new message a name.
- Type in your message's name and click
OK.
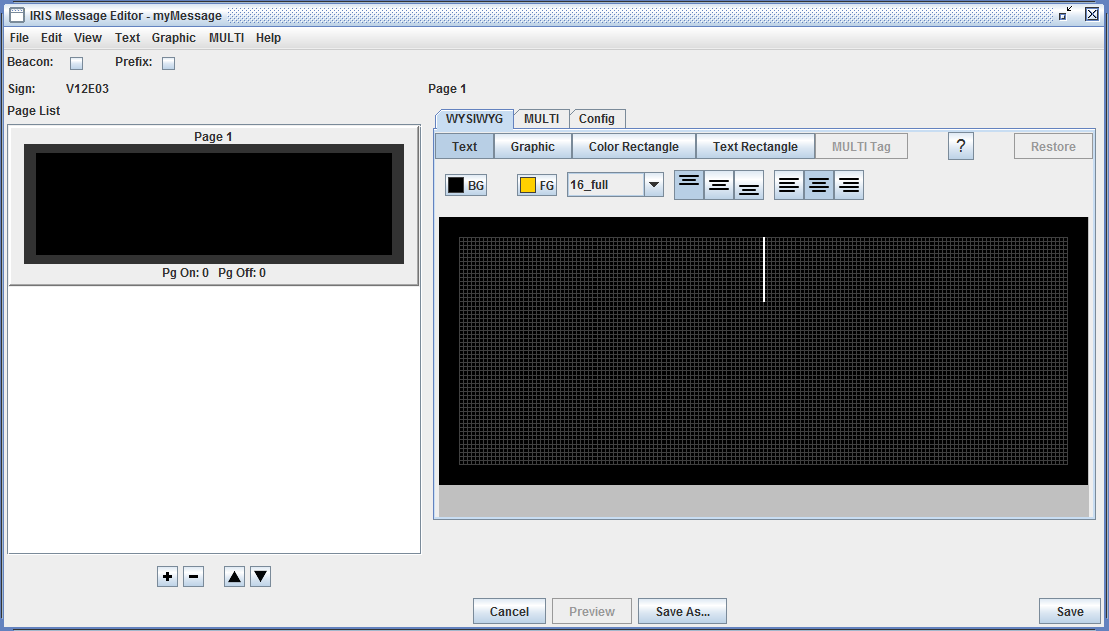
You can now enter text, insert graphic elements, create complex layouts or use action tags in your message. Each of these features is described in the sections below.
Save
A Save button is located at the bottom right of the editor window. Clicking
it will immediately save the message using the current name, this action cannot
be undone.
Save As
A message can be saved under a new name using Save As button. It is located
at the bottom of the editor window. Clicking it will open a window where you
can enter a new name for your message.
Sign Pages
You can easily add, remove and re-order pages for signs in the editor. Multi-page messages are commonly used to display more information that can fit on a single page or create pseudo-animation style effects. Page previews and controls are located on the left side of the editor window.
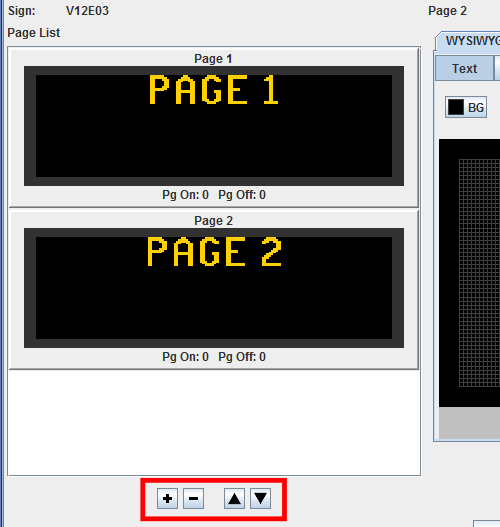
To add a new page, click the + button. To remove a page, select it in the
page list and click the - button. The page selected in the list is
automatically put in the editing window on the right.
To reorder pages, use the arrow buttons next to the page add/remove controls.
Selecting a page and clicking ▲ will move the page up one in the sequence,
▼ will move the page down one position.
Working With Text
Entering text on a sign can be as simple as clicking on the edit window and typing or can use complex layouts of multiple, independently positioned text rectangles with different fonts and colors. The editor makes creating and combining elements a simple point-and-click operation.
Basic Text Entry
For a basic text message, just click on the sign in the editor. The text cursor will appear at a location for text based on the default vertical and horizontal positions for the sign. Text will be entered using the font.
Information messages on roadside DMS typically use basic text with an amber-on-black font, center justification and center vertical positioning.
To edit text on the sign, click the Text button.
Justifications, Color and Fonts
More complex layouts are easily created in the editor. Text justification can be changed by either highlighting a section of text or placing the cursor before the text to be changed and clicking the left, right, or center justification button.
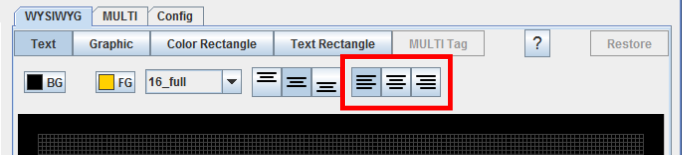
If you enter text that is larger than can fit on the sign, the color will change to purple.
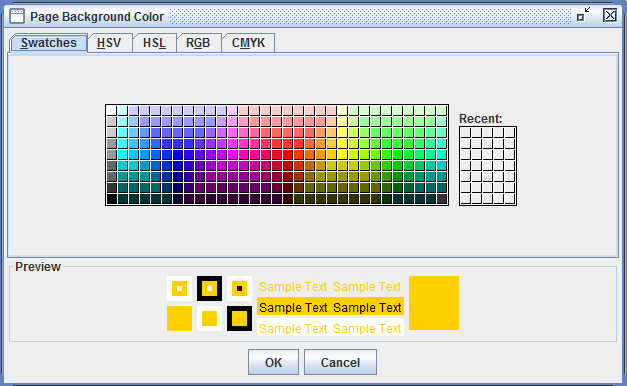
Clicking on the BG button will open a color picker tool, allowing the
background color to be adjusted. Select the desired color and click OK to
apply it to your message.
Text color can be changed by highlighting a section of text and clicking the
FG button. When the color picker tool appears, select a color and click OK
to change the text color.
Text Rectangles
More complex message layouts can be created with text rectangles. These are regions on the sign that can have their own text attribute. Text rectangles can be any size and be placed anywhere on the sign layout. Messages can have multiple rectangles on a single page.
To insert or edit a text rectangle, select the Text Rectangle button.
Place the cursor anywhere on the message and drag to the opposite corner of the
rectangle you want to create. The cursor will then move to the default position
for text within the rectangle.
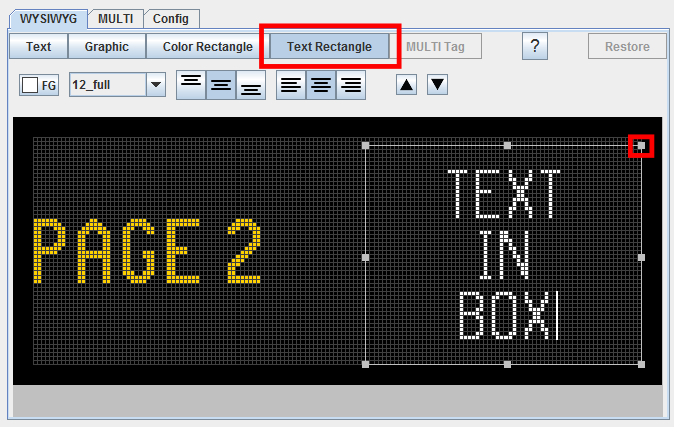
All text controls can be used within the text rectangle. Font, color, justification and position can all be changed. The rectangle itself can be moved or resized in the message by selecting it and either dragging it to a new position or clicking on the resizing "handles" on the outline of the rectangle.
Working with Graphic Elements
Two types of graphic elements can be added to DMS messages: color rectangles and graphic images. These can be used to emphasize portions of a message or can be images such as interstate number shields, warning pictographs or other signs. Either element can be easily added by clicking the appropriate button in the editor window.
Color Rectangles
Color rectangles can be any size from one pixel to the entire valid area of the
sign. To insert one, click the Color Rectangle button, then click on the sign
where you want the rectangle to appear and drag the cursor to the opposite
corner.
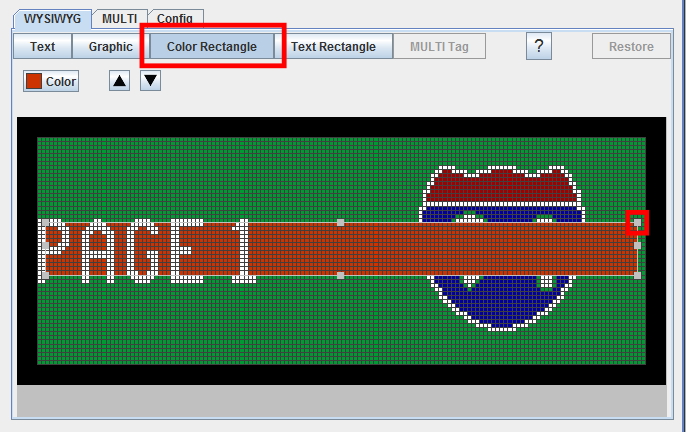
The color rectangle will appear on the page. The rectangle can then be moved or resized in the message by selecting it and either dragging it to a new position or clicking on the resizing "handles" on the outline of the rectangle.
The color of the rectangle can be changed by clicking on the Color button.
Click on the desired color and click OK to apply.
Graphic Images
If placing an image on a roadside sign, consider restrictions for traffic control devices that may affect the design of your graphics. For example, if a speed limit sign is to be displayed, it must conform to the black text on white background (or reverse) sign convention.
Preparing
The message editor can only load graphic images from the IRIS image library. Also, images must have vertical and horizontal dimensions equal to or less than the sign on which they will be used.
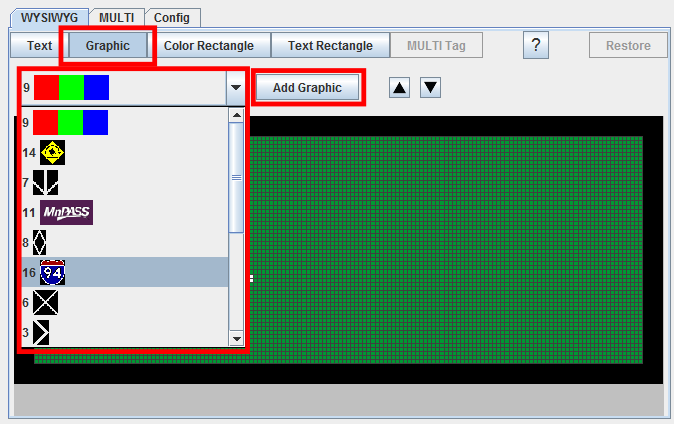
Using Graphics
To place a graphic in your message, click the Graphic button in the editor
window. Available graphics for your sign will appear in the drop down list.
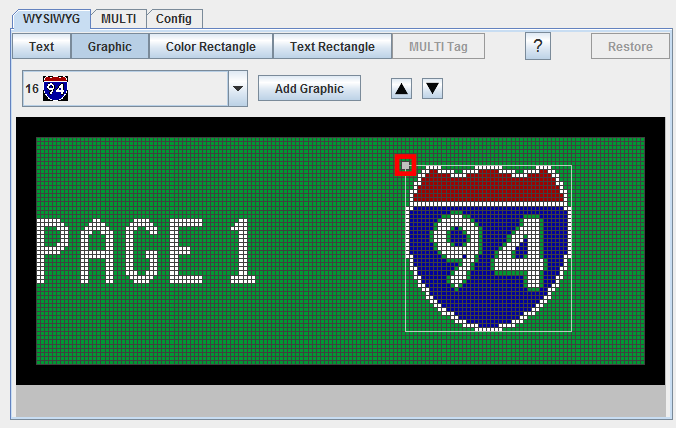
To insert the selected graphic, click on the Add Graphic button.
You can then click on the inserted graphic and drag to any place on your message layout.
Ordering Graphic Elements
Graphic elements have an effective front-to-back order in your message. For example, adding a graphic and then a color rectangle can cause the graphic to be obscured by the rectangle in front.
This can be corrected by selecting the Color Rectangle button to edit the
rectangle, then using the ▼ order button. This will move the rectangle
back in the message. Conversely, the ▲ button moves the selected element
forward.

Note that the text element will always appear on top, or first in the front to back order in the message.
Action Tags
In addition to the standard MULTI tags used for formatting messages, IRIS supports several action tags that allow you to place live data on message signs.
The message editor allows you to place, edit and preview action tags in your message without having to set parameters directly in the MULTI tag. In addition to action tags, the editor allows you to manually insert any valid MULTI tag and set its parameters (if any) by using the MULTI Tag function.
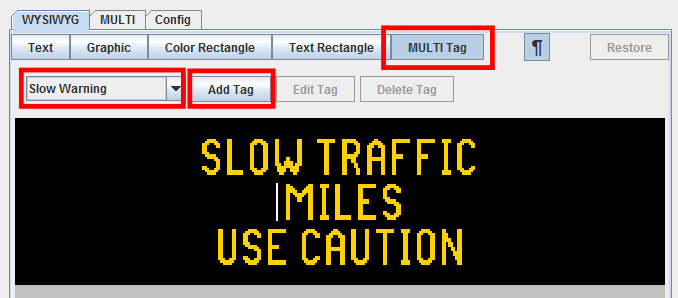
Inserting
To insert an action tag into your message, first enter any text that will be used with it. For example, for a work zone or other sign to warn drivers that there are slow moving vehicles queuing text such as:
SLOW TRAFFIC
XX MILES
USE CAUTION
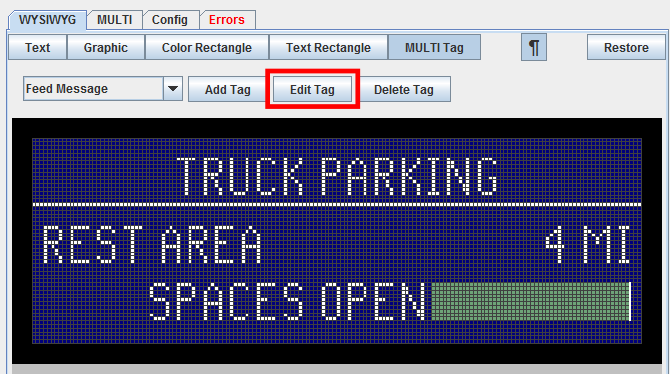
Once your text is entered, click on the MULTI Tag button in the editor.
The MULTI Tag controls will appear. To insert an action tag (or any other
MULTI tag), click on the drop down list at the left of the controls, select your
desired tag, and click the Add Tag button.
A dialog will appear prompting you to set any parameters valid for your selected tag.
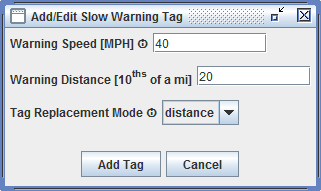
Enter these as appropriate for your message and click Add Tag. Action tags
will appear as green placeholder items as the actual data in the message will
vary based on real-time conditions.

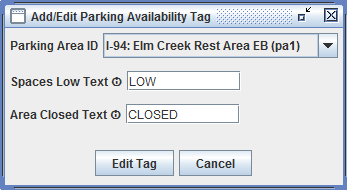
Setting Parameters
MULTI tag and action tag parameters can be edited after the message is
saved. To set parameters, select the message, click on the MULTI Tag
button, then click on the placeholder for the tag.
In the MULTI tag controls, click on Edit Tag. A dialog will appear allowing
you to set the parameters for the selected tag. To save your new settings,
click the Accept button.
Information Views
The editor includes two information views that can assist with creating WYSIWYG messages by providing detailed information about the MULTI code generated by the editor and the target sign.
MULTI View
When messages are created in the WYSIWYG view, the editor automatically creates the code that will be stored and sent to the sign when the message is displayed. This code (called MULTI) can become very long and complex for more sophisticated messages.
The editor provides the MULTI view to directly examine and edit code. This can be useful if a WYSIWIG operation isn't producing the desired output, or if a user wants to set values for position, color or action tag options manually.
The MULTI view is accessed by clicking on the MULTI tab. The code can be
viewed as a single line, which is how it is stored and transmitted to signs or
viewed with line breaks inserted to improve readability. All readability tweaks
are removed when the message is stored.
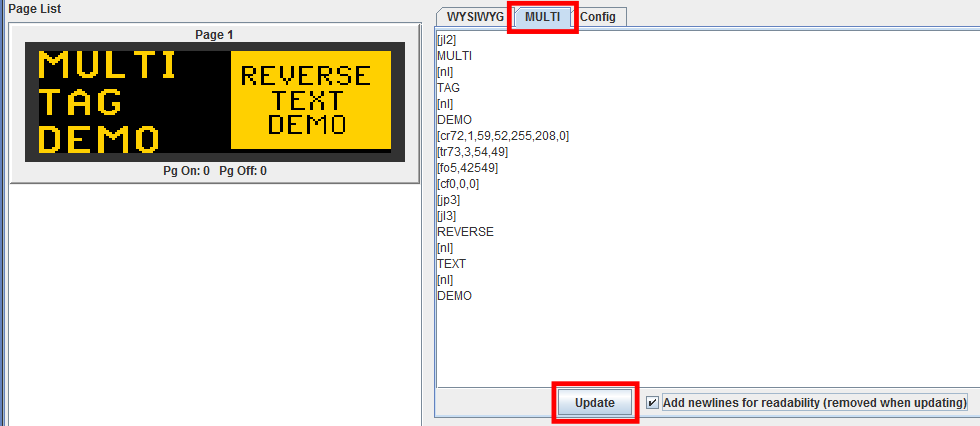
If the message is edited in the MULTI window, click Update to render the
changes you've made.
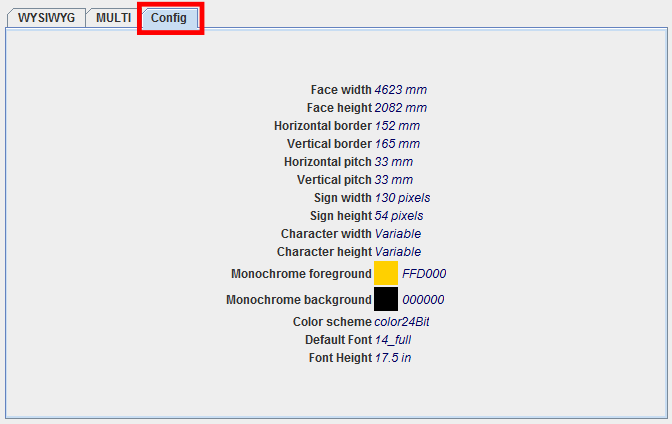
Configuration View
Knowing the details of a sign's configuration is helpful when planning to insert
graphics. To see this information, click on the Config tab. The sign's
dimensions, color capabilities, resolution and default font information is
available.
Keyboard Shortcuts
| Keys | Function |
|---|---|
| Ctrl+Enter | Insert a new page after current page |
| Ctrl+Shift+PageDown | Insert a new page after current page |
| Ctrl+Backspace | Delete by word/tag to left |
| Ctrl+Delete | Delete by word/tag to right |
| Alt+PageUp | Move page(s)/region(s) up in list |
| Alt+PageDown | Move page(s)/region(s) down in list |
| F2 | Open edit-parameter dialog for selected element(s) |
| F6 | Toggle between WYSIWYG and MULTI editor-modes |
| F7 | Toggle between normal and visible tag-edit modes |
| Ctrl+Z | Undo last change |
| Ctrl+Y | Redo last undo |
| Ctrl+Shift+Z | Redo last undo |
| Ctrl+Shift+S | Save As... |